Notes made after creating a spring for a game element in my current Unity project.
I’d built a model and animated it in Blender using rotation, location and scale – no armatures required. I wanted to be able to import the model into Unity with the multi-mesh animation all ready to go. These notes are based on the mesh having only one animation
These notes probably won’t be useful for anyone other than myself. I’m planning on building models as required, rather than in one lump – Which means I’ll forget everything in the meantime & have to relearn every model I build – To avoid this as much as possible, I’m hoping to use these posts as a reference point.
Apologies for any obvious mistakes or omissions – These notes were made as I was learning, and not necessarily as I had learnt.
Exporting a mesh with a single animation created using rotation /scale and location – Using no armatures.
Important safety tip:
when creating animations this way –
if the ‘scale’ of a mesh is modified during the animation
the scale of all child meshes will also be affected
this will only be apparent after importing into unity
the animation will play as expected in blender.

First step – change layout to ‘Animation‘ (top of the window, right of the help menu)

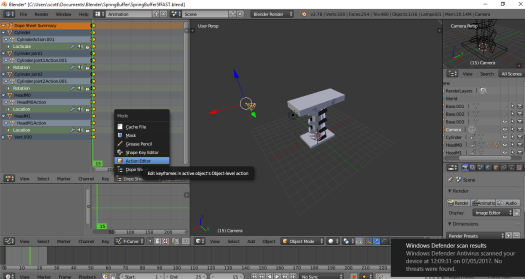
change the view in the top left frame from dope sheet to ‘Action Editor‘

in the ‘Outlier‘ frame on the far right, select all the meshes with animations you want to merge

Back in the ‘Action View‘ frame (top left) – click ‘+ New‘ button to create a new ‘action’ – this will merge the animations of the selected meshes into one action

Blender will be give this the default name ‘Action‘

Click the F button – Positioned next to the Action section

Looking something like this;

Now the action has been created – it needs to be exported to Unity (in this example I’m exporting as an as an FBX)
Select File->Export->FBX

This will display the ‘export FBX‘ options frame
In this section – Select ‘Animation‘ & untick everything except ‘Baked Animation‘

Next – in the ‘Armatures‘ section – clear the ‘Add Leaf Bones‘ tickbox

in the ‘Main‘ section – make sure only mesh is selected (Empty, Camer, Lamp, Armat & Other should be deselected)

& Finally – Click the ‘Export FBX‘ to export and save the model into the Assets folder in your Unity project.
When the model is opened in Unity – it should only show one animation (called ‘Scene‘)

Last post: 1.6 Animating a basic spring
