Big Trouble In Little Blender – 1.6 Animating a basic spring

blender-socket

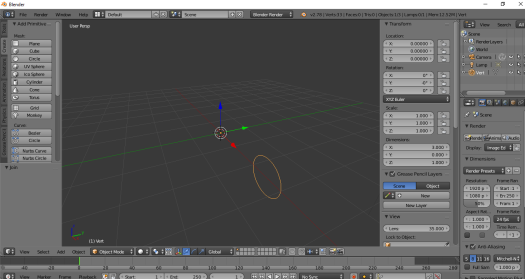
Notes made after creating a spring for a game element in my current Unity project. I needed to animate the spring – The notes below provide a method which keeps the scale intact.

These notes probably won’t be useful for anyone other than myself. I’m planning on building models as required, rather than in one lump – Which means I’ll forget everything in the meantime & have to relearn every model I build – To avoid this as much as possible, I’m hoping to use these posts as a reference point.

Apologies for any obvious mistakes or omissions – These notes were made as I was learning, and not necessarily as I had learnt.


In the add modifier section change the value of the ‘Screw‘ field to stretch the spring to the desired maximum height.

1.1 spring streched

next duplicate the spring using tools->duplicate – creating spring #2

1.2 duplicate button

Back in the add ‘Modifier Tools‘ section – change the ‘Screw‘ value of this duplicate so the spring #2 is at its minimum desired height – then click ‘Apply

1.3 duplicated minimum height

Select the original (fully expanded) spring #1 and click ‘Apply‘ in the ‘Add Modifier‘ box

1.4 Click apply


With the original (fully expanded) spring #1 – still selected

1.5 Select original spring

select ‘data object data‘ – the triangle icon next to the modifiers screwdriver icon

1.6 data object properties

in the ‘shape keys‘ section of ‘data object data

1.7a shape keys

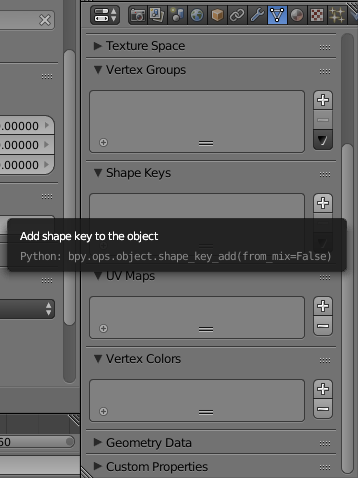
click the + button/icon
this should add an element called ‘Basis
storing the settings the original (fully expanded) spring #1

1.7b shape keys

Select the second (fully contracted) spring #2
hold down shift and select the original (fully expanded) spring #1

1.8 both springs selected

in the ‘shape keys‘ section of ‘data object data
click on the black arrow/triangle (under the ‘add button‘)

1.9a black arrow down
this should display a pull down menu
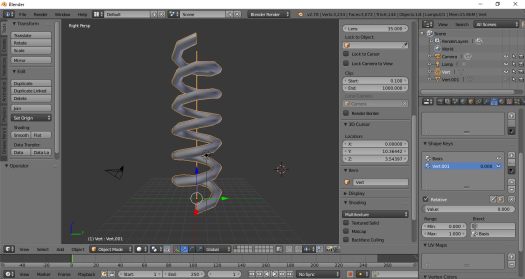
from this menu select ‘join as shapes

1.9b join as shapes
which will add a second element to the ‘shape keys list‘ – this element will have the name of the second (fully contracted) spring #2 (in this case Vert.001)

1.9c second spring added

Since there no further need for the second (fully contracted) spring #2
this can be hidden (or deleted)

1.10 second spring hidden spring


In the ‘shape keys‘ section of ‘data object data
click on the name of the second (fully contracted) spring #2 (vert.001)

doing this should expand the ‘data object data‘ section
displaying more the shape keys parameters
(if this doesn’t occur try clicking on the white down arrow on the right hand side of the ‘data object data‘ section

1.11a second spring entry
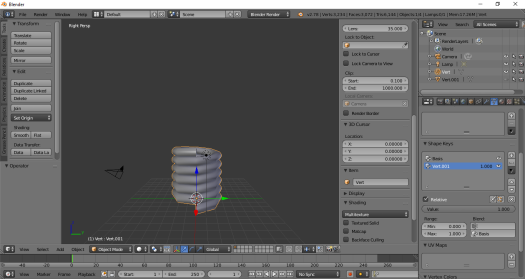
sliding the ‘value‘ parameter up and down should expand and contract the spring.

1.11b spring value 0
Value 0 = Maximum
1.11c spring value 0.5
Value 0.5 = Mid
1.11d spring value 1
Value 1 = Minimum


To create an animation – Using the animation bar move the green marker to the first frame

1.12 Frame 1

in the ‘shape keys‘ section of ‘data object data
slide the ‘Value‘ parameter and set the spring to fully coiled

1.12b Frame Added
& with the mouse pointer OVER the ‘Value‘ parameter press the I key
this will add a frame to the animation bar & turn the ‘Value‘ field green

1.12b Frame Added

in the animation bar move the green marker to the last frame
& with the mouse pointer over the value parameter press the I key

1.13 last frame

In the animation bar move the green marker to the middle frame

in the ‘shape keys‘ section of ‘data object data
slide the ‘Value‘ parameter and set the spring to fully uncoiled
& with the mouse pointer over the value parameter press the I key

1.14 Mid Frame

Now pressing play – you should have a half decent bouncing spring animation

2017-05-13-1336-49---2-ALT


Next post: 1.7 Initial Unity FBX Import & Animation Notes (Part2)

Last post: 1.5 Creating a basic Spring

Contents page.


Big Trouble In Little Blender – 1.5 Creating a basic Spring

blender-socket

Notes made after creating a spring for a game element in my current Unity project. The process itself isn’t too complicated & the results are pretty nice.

These notes probably won’t be useful for anyone other than myself. I’m planning on building models as required, rather than in one lump – Which means I’ll forget everything in the meantime & have to relearn every model I build – To avoid this as much as possible, I’m hoping to use these posts as a reference point.

Apologies for any obvious mistakes or omissions – These notes were made as I was learning, and not necessarily as I had learnt.


First the ‘Add Mesh: Extra Objects‘ add-on needs to be enabled – This is used to add a single vertices later in the process.

To do this – goto File->User Preferences

1.1 User Preferences

This should open the ‘Blender User Preferences‘ window
From here click Add-On’s tab at the top of the window and search for ‘Extra Objects

1.3 Addons

Add a tick to ‘Add Mesh: Extra Objects
& everything is done.


Next add a circle – this circle will be used by blender to create the body of the spring;

2.1 Add circle

Once created – scale the circle to the desired thickness of the spring

2.2 Scale circle

since the spring will coil around the XY axis – the circle needs to be rotated by 90 degrees on the x axis

2.3 Rotate circle

In this example – the spring will be generated/coiled around the central point (position 0, 0, 0).

The radius of the spring will be determined by how far the circle is moved along the x axis

2.4 Position circle 2


Now to add a single vert – this is used to determine the centre of the spring

Make sure the circle is selected.
Press shift-A to open the add menu
From here select – Mesh->SingleVert->Add Single vert

3.1 Add Single Vert

this will add a single vertices at position 0, 0, 0

3.2 Single Vert Added


The mesh and circle need to be ‘joined‘ creating a single object;
Go to ‘object mode‘ (bottom half of the screen – right of the Object menu)
right click the circle
hold shift and right click the single vert
this will select both elements at the same time

4.1 Both Objects Selected

hold ctrl-J – this will join the two objects
it will also move the axis point to the middle of the world (position 0, 0, 0)

4.2 Both objects joined


Next the screw tool is used to generate and define the spring – but first it is needed to create a doughnut;

On the right hand side of the screen in the click the spanner icon
this will open the modifiers section

5.1 modifiers

click ‘Add modifier

5.2 Add modifier

and from the list select ‘Screw

5.2 Add screw

this should apply the ‘Screw Modifier‘ to the circle

5.2 screw added


Construct the spring from the doughnut;

In the ‘Add Modifier‘ ‘Screw‘ settings;

6.1 screw modifier settings

to set the scale of the coil – change the value in the ‘Screw‘ section
this will determine how much the coil rises each 360 degree rotation

6.2 set scale

set the number of coils – change the value in the ‘Iteration‘ parameter
this will termine the size of the spring – the number of coils used to make up the spring

6.3 set iterations

the steps parameter determines how many angles are used to build each coil
the default is 16 – since I generally work with low poly game elements I’m moving this down to 8

6.4 steps 8

make sure ‘click order‘ option is selected to make sure the spring is drawn nicely

6.5 calc order


That should create a simple spring.
if thats all you need – click ‘Apply‘ in the modifiers box to set the values chosen & move on (maybe close the ends of the spring?)

if you want to animate the spring – DON’T click ‘Apply‘ quite yet… go to the next post (link below) and continue from there…

7.1 apply settings


Next post: 1.6 Animating a basic spring

Last post: 1.4 Initial Unity FBX Import & Animation Notes (Part1)

Contents page.